Showing posts with label recipes. Show all posts

Friday, December 30, 2011

See you next year!

The boys are having so much fun giggling over the old "see you next year" thing with their friends.  Do you remember how funny that was in elementary school?  We're reliving it around here--daily, maybe hourly!  For the non-elementary school set, here is a different kind of New Year's treat; something delicious to sip as you ring in the New Year. (I promise this won't become a cooking blog.  Food just happens to be my favorite holiday activity.  My non-holiday favorite activity too if I'm being honest).

I have a few bottles of Ketle One sitting around, thanks to a goodie bag from a recent wedding (I know!  How awesome are my perks?), so I'm going to whip up some raspberry cosmos for tomorrow night.  A little 2000-late maybe on the cocktail trends, but nothing this yummy should ever go out of style.  AND, thanks to Tradewind Tiaras, a thoroughly modern take on cocktail garnishes.  EDIBLE rice paper butterflies to rest on the rim of your glass, though any other shape created with a paper punch is possible too, and easy!  Gorgeous, glamorous, and so 2012.

Emailing: butterflyricepaper.jpg

Raspberry Cosmopolitans
makes 1 pitcher, about 6 cocktails
  • 2 cups good quality vodka, such as Ketle One or Grey Goose
  • 1/2 cup Triple Sec
  • 1/2 cup Chambord
  • 2 cups cranberry-raspberry cocktail juice
  • 1/2 cup freshly squeezed lime juice
  • fresh raspberries, sugar, rice paper garnish...all the pretty extras! 
Mix everything except raspberries in a pitcher.  Individual drinks should be poured and shaken in a cocktail shaker with ice before serving.  Garnish rim of each glass with sugar (wet rim first with vodka, dip in sugar) and a pretty edible paper garnish if desired.  Extra raspberries to float in your drink are a must! 

P.S.  I'm going to try making homemade raspberry vodka this summer. There is a restaurant in Seattle that has a huge glass container of vodka and raspberries, just sitting there on the bar muddling together and being heavenly in general.  It's the most delicious and dangerous concoction, and the reason I first fell in love with raspberry cosmos.

Ok, seriously.  Have a safe and delicious holiday.  And see you next year! 

Monday, December 19, 2011

A little Christmas gift for you...open immediately!


Hi!  It's been such a long time, so I thought I'd pop in for a little holiday cheer.  I've been off decorating for other people's holiday parties, throwing a few holiday parties myself, wrapping, baking, tree-trimming, watching Love Actually, building gingerbread houses, visiting old friends...and finding out that it really is a magical season when you are sharing it with a four and six-year old.  Mine are literally glowing with excitement right now. 


Noah and I had such a good time baking this morning, preparing an old family favorite to ship off to my sweet sisters and brother.  Like so many grandmothers, ours used to bake for the whole family, and whether near or far, we always got a box of cream wafers from her.  (The "open immediately" package was always the one I was most excited about.  The "open later" was usually something to wear, and bless her heart, she was a much better baker than stylist!).  Grandma hasn't been able to bake or send cookies for several years, so Noah and I spent the morning channelling all of her baking talent into a little "open immediately" box for my sisters that miss getting one from Grandma.   

So these are our family favorite, now for a fourth generation. They don't sound like much when you read the recipe; just three ingredients after all!  But the wafers and the filling together are a magical combination...delicate, buttery, flaky, melt-in-your-mouth goodness!  Since I can't give every one of you an "open immediately" box for Christmas, a recipe instead. 

The Merriest Christmas to you!

Cream Wafers

Cookies: 
  • 1 cup soft butter
  • 1/3 cup whipping cream
  • 2 cups flour, sifted
Heat oven to 350 degrees.  In bowl of electric mixer, cream butter for 2 minutes.  Add whipping cream, and beat on medium for 2 more minutes.  On low speed, slowly add flour just until incorporated.  Roll dough out to 1/4"-1/8" thick.  Cut with small cookie cutters, making sure to do an even number of each shape (they will be sandwiched together later).  Transfer cookies to a plate with sugar, and pat sugar into surface firmly, to coat.  Place on sheet of parchment on a cookie sheet, and lightly pierce all over with a fork to make tiny dots on surface to prevent bubbles.  Bake 7-9 minutes, watching carefully and removing at the slightest hint of browning.  Cool completely.

Filling
  • 1/4 cup soft butter
  • 2 cups powdered sugar, sifted
  • 1 egg yolk
  • 1/2 tsp almond extract
  • drizzle of whipping cream to make frosting a spreadable consistency if needed
Beat all ingredients together, adding just a tiny bit of whipping cream if needed to get a spreadable consistency.  Tint with pink or green food coloring if desired.  

Sandwich cream wafer cookies together with filling and enjoy! 

Tuesday, May 4, 2010

'Tis the season

For sweet, tart, rosy pink, tender rhubarb!  There is nothing quite like rhubarb in the spring.  This is one of my favorite ways to prepare it--a strawberry rhubarb crisp with a very surprising twist.  Don't leave it out, even though it sounds like the BASIL is a mistake in the recipe.  It does something amazing that can't easily be explained; sort of like pepper in chocolate. 


One of my favorite spring (easy!) dinner menus is Uncle Harry's Flank Steak, served with risotto and asparagus, with this crisp as the perfect ending. 

Strawberry Rhubarb Crisp


2/3 cup granulated sugar
2 or 3 tsp. cornstarch
1/2 tsp. ground cinnamon
2 cups sliced fresh rhubarb (or frozen unsweetened sliced rhubarb, thawed)
2 cups coarsely chopped strawberries
2 Tbsp. snipped fresh basil leaves (not dried!)
1/2 cup all-purpose flour
1/2 cup oats (oatmeal)
1/3 cup packed brown sugar
1/4 tsp. salt
3 Tbsp. melted butter


Preheat oven to 375 F. In a medium bowl combine the 2/3 cup granulated sugar, the cornstarch, and cinnamon. (For fresh rhubarb, use 2 tsp. cornstarch; for frozen, use 3 tsp.) Stir in rhubarb, strawberries, and basil. Spoon into bottom of a 2 quart casserole/baking dish; set aside.
In another medium bowl, comine flour, oats, brown sugar, and salt. Stir in melted butter. Sprinkle over fruit.

Bake 30-35 minutes, or until fruit is tender and topping is golden brown. Serve warm with good vanilla ice cream. Serves 6.

(My copy of the recipe lists nutrition info, which shows that this is remarkably pretty good for you! Per serving: 276 calories, 7 g fat, and 51% of your daily vitamin C!).

Tuesday, January 5, 2010

Recap

While away, I...

  • ate really fantastic food (and a lot of it)
  • watched two little boys light up with joy
  • attended a four-hour high mass (whew!)
  • reveled in a visit from bro/sis/bro-in-law
  • gave and received foot duvets
  • saw a hilarious movie
  • had a lot of winter fun...sledding, SNOW, snowfights, snow falling like huge goose feather flakes, new furry boots in the snow, videos of boys hookiebobbing in the snow...
  • danced my tail off in an airplane hangar
  • saw the biggest book in the world (oddly enough, post holiday food, I weigh exactly the same thing as that book. ugh)

Back to the important stuff...all that fabulous food! Along with the old holiday favorites, it seems like at every gathering I went to there was something new that I'm not sure how I had lived without for so long. Milo's Vietnamese sandwiches will probably reappear once a week in our house, mac n' cheese will never be the same, and so long to frozen pizza for Christmas dinner (an unfortunate part of our recent history)--crab is the new game in town! Oh, and wait until I tell you about the bacon!

But my late Christmas gift to you is a recipe I just came up with today. I have a dear friend that knows my weak spots and spoils me with things I can't resist...the latest being a container of ginger orange candied almonds brought along for the New Year's trip. The ingredient list was short though, and my first try today was fairly successful if I do say so myself! Easy, savory, sweet, slightly salty, filled with protein, excellent on salads or as a snack on it's own...basically, totally irresistable. Have fun!


Ginger Orange Almonds

Note: the picture above shows sliced almonds, as that's what I had on hand today. The originals were made with whole almonds. Use whatever you prefer because it really won't affect the yumminess.

Ingredients:

  • 1 egg white
  • 1 cup almonds
  • 1/2 tsp ginger (from the spice cabinet, not fresh)
  • 1/4 tsp salt
  • 1/2 cup granualted sugar
  • zest of one orange

Directions: Whisk egg white until no liquid remains. It should be a very thick froth, but does not need to get all the way to soft peaks stage. Add everything else and gently fold together. Spread on a foil covered cookie sheet and bake at 325 for about 10-15 minutes. Stir occasionally to break up the clumps and loosen the nuts from foil. Watch carefully at end, and remove right after they turn a pretty golden brown.

Monday, November 23, 2009

I'm thankful for this!


This being a STUNNING recipe for sweet potato casserole!

Hold on, don't click off of here yet, all of you potato haters! This recipe from Cooking Light a few years ago (yes! it's light!) has successfully converted EVERY person I've ever served it to into a sweet potato lover. The family voted me sweet-potato-bringer for every Thanksgiving from here until eternity after I made it the first time, and I've never felt any desire to fiddle with it's formula for delicious perfection. The crazy part is I usually see several people sneaking into the fridge to heap a little more on their plate at dessert time.

If you're the sweet-potato-bringer for your feast, please, PLEASE give it a try this year. You'll be thankful for ME!

Fluffy, Awesome, Sweet Potato Deliciousness
The potato part of recipe can be made a day ahead and refrigerated. I usually make the topping the day before as well, and just keep in a separate container until time to bake. And don't worry if the potato mixture is very thin when you pour it into the baking dish--that's what makes it taste almost like a souffle. Serves 10-12.
Potatoes:
2 1/4 lbs. sweet potatoes, peeled and chopped
1 cup half-and-half
3/4 cup packed brown sugar
1 tsp salt
2 tsp. vanilla extract
2 large eggs

Topping:
2 cups miniature marshmallows
1/2 cup all purpose flour
1/4 cup packed brown sugar
1/4 tsp. salt
2 tbsp. chilled butter, cut into pieces
1/2 cup chopped pecans, toasted

1. Preheat oven to 375.
2. Place potatoes in large pot, cover with water. Bring to a boil, reduce heat and simmer 20 minutes or so until very tender. Drain, cool slightly.
3. Place potatoes in a large bowl. add half-and-half, 3/4 cup brown sugar, salt, and vanilla. Beat with a mixer at medium speed until smooth. Add eggs, beat well. Pour mixture into a 13" x 9" greased baking dish.
4. To prepare topping, sprinkle miniature marshmallows over top of casserole. (This is the one place I do mess with the recipe. I can't resist accidentally spilling too many onto the top). In a medium bowl, combine flour, 1/4 cup brown sugar, 1/4 tsp. salt. Cut in butter until mixture is course crumbs. Stir in toasted pecans and sprinkle over marshmallows.
5. Bake at 375 for 30 minutes or until golden brown.


Wednesday, April 22, 2009

Chocolate Pavlova

I've always loved ballet and the image of the classic Russian ballerina. I danced for years and still dabble in classes sometimes. My crazy brain seems to need the occasional opportunity for that all-consuming concentration that an hour and a half in the dance studio demands. It clears my head of all of the junk, stress, and distractions that seem to accumulate.


I think my love for ballet began back in fourth grade when I read Anna Pavlova's biography. While my friends were obsessing over Mary Lou Retton, I was transfixed and mesmerized by the legendary Russian dancer from the early 1900's. You know that dinner party question..."who would you have dinner with if you could invite anyone in history, living or dead?". Anna would definitely be on my guest list even today.


So...it's probably no surprise that one of my very favorite desserts is the Pavlova. (Yes, of course it's named after her). This past Valentine's Day I was assigned dessert for our potluck dinner with friends, and found something even better...a chocolate Pavlova. It received rave reviews for the crispy outside, chewy dense meringue center, luscious ganache, and fluffy topping of whipped cream and fresh raspberries. Hungry yet?


The recipe is here, and I'll add in one little word of warning. On Valentine's, a few of us tried to cut the meringue into serving sizes, and had a helluva time. I don't think it was entirely due to the yummy Gloria Ferrer we had consumed either. I was lucky to be spending Valentine's with five other people I'm totally crazy about instead of just one, because we ended up putting the Pavlova in the middle of the table and descending upon it like messy, cozy vultures, silverware be damned. If you see this as a problem or if you are making this for a first date, you could easily just make 4-6 individual meringue shells from the same recipe. Personally, it was extra fun to be goey and chocolatey with friends and I'll be keeping the recipe as is.

Thursday, June 5, 2008

Delicious resource

I just received an e-mail yesterday from Epicurious announcing their new wedding resource page, and it is such a find!

Epicurious is always my go-to when I need a good recipe; they have about fifty gazillion in their data base, and they're all compiled from such excellent sources as Gourmet and Bon Appetite. Now they have a great wedding section with recipes, wine advice, entertaining ideas, and even help with registering for everything you need for a first kitchen. They also have specific sections of engagement parties, bridal showers, and even edible party favors. And of course, it's all illustrated with beautiful pictures.


I think this lavender and peach bellini sounds summery and heavenly...(and has already made me break my rule about posting recipes I haven't tried). What a perfect signature cocktail.

Lavender and Peach Bellini

Ingredients
1 part peach puree
2 parts Prosecco or another sparkling wine
1 pinch of edible, nontoxic, dried or fresh lavender

Preparation
1. Place the puree in the bottom of a champagne glass.
2. Carefully pour in the sparkling wine.
3. Don't stir, but use a spoon to pull the puree up along the sides of the glass, so that you won't lose the bubbles.
4. Decorate with the lavender.

Tip! If you are having a hard time finding peach puree, you can also use high quality peach juice or another fruit puree. A classic Bellini has peach liquor as a top layer.

Reprinted on Epicurious from Perfect Parties
Skyhorse Publishing , © October 2007

PS--Did I mention that on Noah's first birthday I decided it was time for me to get rid of the last seven pounds of him that he forgot to take with him when he was born? Perhaps the reason for the food obsession here this week...

Monday, June 2, 2008

Weekend update

So...apologies are in order if any of you actually used my recipe from Friday. I did, and sadly the picture was divine, the actual cupcakes, not so much. A few thoughts:

1. For Alexa: do not post recipes (no matter how lovely the image or imagined result), if the result is just imagined! Try them first!

2. For the reader: try these instead! I have tasted, tested, and loved these. Just please UNDERCOOK them--or they will be a little dry. But if you take them out when still very gooey in the middle, they are like a baked chocolate truffle. Truly divine.

Friday, May 30, 2008

This weekend...

I think I'll make these cupcakes. I have the next two weekends off before the next round of weddings begins, so I'm looking forward to time with my little guys, a pedicure with a friend, working in the garden, and a little time spent baking.

Photo and recipe courtesy of Sweet Paul. Don't they look divine?

Chocolate Coconut Cupcakes

Makes 12 large cupcakes

1/2 cup unsalted butter, softened
1/2 cup sugar
3 eggs
1 cup plain flour
1/4 cup shredded coconut
4 tablespoons good quality cocoa powder
1 1/2 teaspoon baking powder
1/2 cup shredded coconut
1 teaspoon cocoa powder
ice cream, for serving

Preheat oven to 350F. Beat butter and sugar until pale. Add eggs, one at a time. Mix well. Add flour, coconut, cocoa and baking powder. Mix well. Pour the batter into a 12 cup buttered cupcake tin. Place in oven and bake for 12-15 minutes. Cool on a wire rack. Toss the shredded coconut in cocoa powder.

Serve the cupcakes with the chocolate coconut and ice cream.
Photo:Colin Cooke

Saturday, May 3, 2008

Derby Day!


Last year's winner, Street Sense

A good friend was sharing her plans with me for the weekend, which include a great party to celebrate the Kentucky Derby. She's been busy making a hat all week, and I can't wait to see the result. In the meantime, I thought I'd share some Derby atmosphere with you (because really, how could an event get any better? A sense of history, crazy fashion, beautiful horses, and yummy drinks!).

It's tradition at the Derby to wear your most fashionable (and giant!) hat.


A few people get REALLY wacky with their fashion.

"March to the Derby"


The official drink of the Kentucky Derby is the Mint Julep. Here is the classic recipe, along with a few facts (from the official Kentucky Derby site).

The Mint Julep has been the traditional beverage of Churchill Downs and the Kentucky Derby for nearly a century. Early Times Kentucky Whisky has been privileged and honored to be a part of that tradition. The Early Times Mint Julep Ready-to-Serve Cocktail has been "The Official Mint Julep of the Kentucky Derby" for more than 18 years.

Each year, almost 120,000 Early Times Mint Juleps are served over the two-day period of the Kentucky Oaks and Kentucky Derby. A feat that requires over 10,000 bottles of Early Times Mint Julep Ready-to-Serve Cocktail, 1,000 pounds of freshly harvested mint and 60,000 pounds of ice.

The Early Times Mint Julep Ready-to-Serve Cocktail is a staple at the track the rest of the year as well. In fact, the Grade II Early Times Mint Julep Stakes on June 17 at Churchill Downs is sponsored by Early Times.

You can also find the Early Times Mint Julep Ready-to-Serve Cocktail at your local retailer. The commemorative bottles have become collectors items for many, capturing the mood and spirit of the famous Churchill Downs track and Kentucky Derby race. If the Early Times Ready-to-Serve Cocktail is not available from your local retailer, you can make your own with this time-honored recipe:

The Early Times Mint Julep Recipe
2 cups sugar
2 cups water
Sprigs of fresh mint
Crushed ice
Early Times Kentucky Whisky
Silver Julep Cups
Make a simple syrup by boiling sugar and water together for five minutes. Cool and place in a covered container with six or eight sprigs of fresh mint, then refrigerate overnight. Make one julep at a time by filling a julep cup with crushed ice, adding one tablespoon mint syrup and two ounces of Early Times Kentucky Whisky. Stir rapidly with a spoon to frost the outside of the cup. Garnish with a sprig of fresh mint.

All pictures from Kentucky Derby's fickr photostream.

Monday, April 14, 2008

Housekeeping...

Just a quick post this morning to say Happy Monday! I had a wonderful weekend in the studio with a rehearsal dinner on Friday (in gorgeous shades of dark pink and deep red; peonies, roses, orchids...I loved the vibrant colors!) and a wedding for the same couple on Saturday (Canlis restaurant, a very loose, untailored look in powder blue, pale green and soft petal pink).

But as a result of all the fun I've been having with flowers, I've fallen behind on a few things I wanted to share! I'll have some great interviews this week as well as pictures from both events this weekend, so keep watching for those. In the meantime...
1. Peonies. They've been growing like crazy this past week!


2. My favorite arrangement of the week.


3. No "week in review" last week, so I wanted to share this fabulous idea from Elizabeth from Elizabeth Anne Designs. She had a great suggestion for a common problem--what job to give little guys that want to be involved in the wedding but are too big to be ring bearers. She said "I think every church I’ve seen has entry way doors that can be closed after the bridesmaids have processed but before the bride appears. Why not have them do the honor of opening the doors for the big reveal. It’s a big job, but an easy one, and the 8-year olds would probably much rather do that than be ring bearers". I love this idea!


4. Scenes from a walk on Capitol Hill Saturday night for a friend's birthday. These were in the window of Retrofit Home. Of course I love the deer, but also notice the cute white cuckoo clock made of stamped metal. Funky!


5. And...the cookies that got me through the weekend! These might actually be my all time favorite cookies. When Steve made them for the first time a few years ago from the back of the mint chocolate chip wrapper, I totally scoffed. I'm a cookbook addict, so was convinced he'd find a better use for the great chocolate chips there. My first bite told me otherwise though. Then, last year, I misplaced the recipe. I spent a full year looking in every single grocery store I ever went in (anytime I traveled I made sure to hit the store and take a look) for the Hershey's chocolate chips so that I could get the recipe back. No luck; they weren't selling the chips anymore. I tried to buy them on-line; no luck. I tried to special order them; no luck. I tried the Hershey's website, I tried other recipe sites, I tried calling Hershey's...NO LUCK! It was as if the recipe had never existed. Then, a few weeks ago, I found it tucked into the spine of one of my favorite chocolate cookbooks...as if the recipe knew all along that it was cookbook worthy!

Anyway, I feel obligated to pass it on (there might be someone else out there searching away for this recipe), plus if I ever lose it again, I'll be able to find it on my own site now! But really, these cookies are chocolatey goodness heaven!!!


Double Chocolate Mint Cookies
(from Hershey's Kitchens)

Note on chocolate chips: I doubt you'll be able to find Hershey's chocolate chips, but DO NOT substitute the pale green variety. They are made out of white chocolate, which will not give at all the same result. Follow my modification in the recipe, using normal chocolate chips, and you'll get the exact result. Oh, and if I haven't mentioned it before, Trader Joe's makes the BEST semi-sweet chocolate chips--so much better than even the "gourmet chips" available now.
Ingredients:
2/3 cup unsalted butter, at room temperature
1 c. sugar
1 egg
1 tsp. vanilla extract
1/2 tsp. peppermint extract (only if you are not using mint chocolate chips)
1 c. flour
1/2 c. baking cocoa
1/2 tsp. baking soda
1/4 tsp. salt
10-12 oz. semi-sweet chocolate chips (or mint if you can find them!)

Directions:
Heat oven to 350. Beat butter and sugar in large bowl until creamy. Add egg, vanilla, and mint extract and mix. Sift or mix together flour, cocoa, baking soda and salt, gradually add to butter mixture. Stir in chocolate chips. Drop by rounded teaspoonfuls on baking sheet. Bake 9 minutes (DO NOT overbake--they should still look pretty underdone when you take them out!). Let set on the sheet for 3-4 minutes, then let cool completely on wire rack.

Enjoy! The cookies, your week...

Wednesday, March 26, 2008

Evolution of a blogger

I have to admit...I haven't been hanging out in this weird blogosphere world for long (though obviously long enough to pick up some geeky lingo). So I'm still learning...and you are all bearing with me (which I really appreciate!). And just yesterday...I learned about something really great that you might already know about, but I thought I'd share just in case!

But first, a short time-line, so that I can give credit where it is due:

Mid-early 2002?: Hear the word blog, can't figure out why people would want to put their diary on -line for the world to read. What a bunch of emotional exhibitionists!

February 2004: Friend Sarah tells me about Orangette, and I'm so taken with Molly's writing and superb recipes that it is my homepage for the next year. Find the best banana bread recipe on earth*, never go back to the classic.


2005-early 2008: Occasionally look at a few cooking blogs now and then.

January 2008: Noticing more wedding and decorating blogs, getting hooked. Friend Robin mentions that her husband has named her "Bloggy" because her relaxing every night is looking at blogs for design help for new house. Friends in the biz say that its a great way to let clients know a little more about you.

February 2008: Spend a few frustrating days messing around with various blogging programs, and start Fiore fresco.

March 2008: Worry obsessively that no one at all is reading the blog, get some very sweet comments by friends and clients that they enjoy it and are passing it on. Still worry obsessively that no one is reading blog.

March 23, 2008: Read on Elizabeth Anne Designs that she loves her Google Reader. Her WHAT? You mean, I can get updates sent to me, in one place, so that I know as soon as people have posted? So that I'll remember each day to check my favorites? You're kidding!

March 25, 2008: Figure out how Google Reader works (five minutes), load some of my favorite blogs (another five minutes), and have a relaxing and inspirational afternoon catching up with news in the blogosphere!


March 26, 2008: Can't sleep in the middle of the night, check my Google Reader, and realize that I haven't made it possible for any of you to add Fiore fresco into your reader. Promptly resolve issue!

Daytime, March 26, 2008: You, dear reader, check out Google Reader and hopefully give it a try! Load up Fiore fresco and a few others, and you'll soon be wasting (I mean saving) as much time as me!

Note: Adding subscriptions was the only tricky part to the Reader (because there are a couple of ways to do it, and some seem to work better than others). I found that clicking the orange feed button in your toolbar put things in the wrong spot. The best way was to go into Reader, type the name of the blog in the green "add subscription box", and it will work like a search engine. Click "Subscribe" under the blog, and you're all set!

*Banana-Coconut Bread
Recipe and picture from Orangette: (with a minor change, shown in green)


Adapted from HomeBaking: The Artful Mix of Flour and Tradition around the World, by Jeffrey Alford and Naomi Duguid.

I have one word for you: demerara. This bread is lovely in its own right, but it owes a good deal of its charm to this very special sugar. Demerara has large, golden grains that sparkle in the light, and sprinkled on top of this banana-moistened batter, it yields a crisp, sweetly craggy crust that steals the show - and that stays crunchy on the second day, even! You can buy demerara sugar online from any number of sources, or look for it in your local gourmet store. I found mine at an upscale market nearby, and I think Whole Foods also carries it. Either way, buy it. If you’re anything like me, you’ll want to sprinkle it all over the place.

About 3 large, overripe bananas
2 cups unbleached all-purpose flour
¾ tsp. baking soda
½ tsp. freshly grated nutmeg
Pinch of salt
1 stick (4 ounces) unsalted butter, at room temperature
1 cup granulated sugar
1/8 tsp distilled white vinegar
1 ½ Tbsp. dark rum
½ cup dried shredded unsweetened coconut
1/2 cup demerara or dark brown sugar

Preheat the oven to 350 degrees Fahrenheit. Butter a standard-size loaf pan, and sprinkle with 1/4 cup raw/Demerara sugar (the same way that you would usually use flour). In a blender or food processor, purée the bananas. Measure out 1 ½ cups of purée. Set the purée aside.

In a medium bowl, whisk together the flour, baking soda, nutmeg, and salt. Set aside.

In a large bowl (or the bowl of a stand mixer), beat together the butter and sugar until light and fluffy. Add the vinegar and rum, and beat to mix well. Add the banana purée and the flour mixture alternately, about 1 cup at a time, beginning with the banana and beating to just incorporate. Use a spatula to fold in any flour that has not been absorbed, and stir in the coconut. Do not overmix.

Scrape the batter – it will be thick – into the prepared pan. Smooth the top, and sprinkle evenly with the remaining demerara sugar.

Bake for 50-65 minutes, or until the top is nicely browned and a toothpick inserted in the center comes out clean. Let cool on a wire rack for about 20 minutes; then turn the loaf out of the pan and allow it to cool completely. This loaf will keep, sealed airtight, for three to four days, although it is best, I think, on the second day.

Yield: 1 loaf


Monday, March 3, 2008

Happy Birthday at our house today!

We've been busy today getting ready for a little family party tonight for Steve, my sweet husband.


The fun part about this is watching Hayes start to enjoy birthdays and doing things for other people. He had so much fun baking a cake this morning, and can't wait to make a big Happy Birthday sign after nap. He also loves showing off his cheesy grin for pictures, especially with a chocolatey face.


I use birthdays as an excuse to bake. I know this blog should probably be about flowers and decor, but I also know that occasionally one of my other great loves--cooking--especially baking--will probably intrude. So, I wanted to share a few thoughts about dessert today.

1. Elevate your food! If you are serving something wonderful, put it on the pedestal it deserves. It will immediately look even more beautiful, and I think it even tastes better because it has such a special status. I have several cake plates; I like to find them at antique stores and yard sales, but there are some gorgeous new ones out there too. I particularly love Martha's ironstone cake pedestals at Macy's. They are so simple, clean and classic, and look wonderful on their own or in a stack of three. I have several brides this summer planning smaller receptions with cupcakes for their celebration dessert. Wouldn't the set of three pedestals look wonderful covered and surrounded by cupcakes?


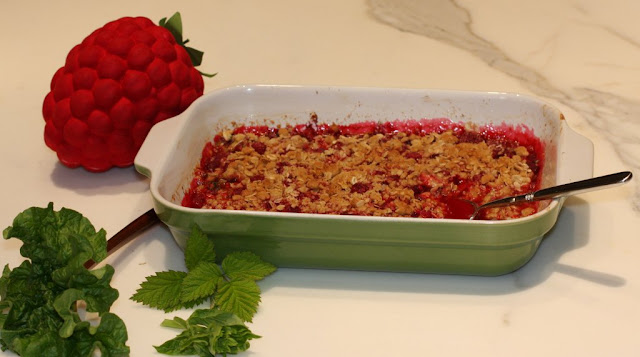
2. Chocolate and Raspberries. Heaven. So, today is our family party with an easy chocolate cake that Hayes could help with. But Friday we had a few friends over, and I wanted to make something rich and decadent, chocolatey and sinful. I know that the flourless chocolate cake is ubiquitous, but I finally came up with one that is special. I based my recipe on one from Pure Chocolate by Fran Bigelow (of Fran's Chocolate--a Seattle treasure!), but tweaked things to accommodate one of my favorite ingredients, raspberry chambord, and to make the chocolate a little "darker", not so sweet. It turned out like a dense, velvety mousse with deep raspberry undertones and is pretty amazing if I do say so myself. I think it deserves to be shared. It is easy but impressive!


Decadent Chocolate Raspberry Torte
inspired by Fran Bigelow's Chocolate Espresso Torte

Notes:
*
I really love recipes that have just a few simple, perfect ingredients. However, when you cook like this, you must use the BEST ingredients since each will have a strong presence in your finished product. Do make the effort to use good quality chocolate such as Callebaut, Valrhona or Scharffen Berger. Callebaut is my favorite.

*The raspberry chambord sauce is one of our favorites for ice cream, and it is the best way to start the weekend on top of pancakes!

Ingredients:
*8 oz. bittersweet chocolate, finely chopped
*8 oz. semi-sweet chocolate, finely chopped
*3/4 lb. (3 sticks) unsalted butter, room temperature
*1/2 cup raspberry chambourd liqueur
*1/4 cup sugar
*8 large eggs, room temperature

1 recipe chocolate butter glaze (follows)

1 recipe raspberry chambord sauce (follows

Directions:
1. Position rack in middle of the oven, preheat to 300 F. Butter a 9" cake pan and cover the bottom with a round of parchment paper.
2. Melt chocolate in double boiler over low heat. Remove when tiny pieces of chocolate remain. Cut butter into small cubes and begin stirring into chocolate. Butter should easily incorporate; if it separates while melting, allow chocolate to cool more before adding more butter. After all butter is added, allow mixture to continue to cool and thicken until consistency of very soft butter.
3. Place chocolate/butter mixture in bowl of an electric mixer. begin mixing at very low speed and add chambord and sugar slowly.
4. Crack eggs into separate small bowl, whisk just to break yolks and combine. With mixer on low (you do not want to incorporate any air into batter), slowly add eggs in thin stream. Mix just until incorporated.
5. Pour into prepared pan, smoothing the top. Place on a rimmed baking sheet in oven, and add 1/2" water to baking sheet (not cake pan!). Cake pan should be sitting in the hot water while baking, which is called a "bain-marie".
6. Bake for approximately 40 minutes. DO NOT over bake; check carefully starting around 30 minutes. Top should be set, but cake will still jiggle with you shake the pan. A toothpick 1" from edge should come out with crumbs clinging to it, but it should appear underdone if tested any closer to center.
7. Let the cake cool in the pan for 30 minutes. Cover loosely, refrigerate additional 30 minutes. Cake should be approximately room temperature when you glaze it.
8. Glaze cake: starting about 1/2" from edge, apply thin line of glaze. Gently push to the edge and smooth so that sides are covered. Pour remaining glaze in center and smooth.
9. Serve cake at room temperature with Raspberry Chambord sauce. Store at room temperature for up to 5 days.

Chocolate Butter Glaze
*8 oz. chopped bittersweet or semi-sweet chocolate (I like a combination, adjust to your taste)
*1 stick unsalted butter

Melt chocolate slowly in double boiler until almost all chocolate is melted. Remove from heat, continue stirring slowly until all chocolate is melted. Slowly add cubed butter and continue to stir until it is incorporated. Allow to cool briefly; glaze should be slightly thick so that it won't run off of the torte, but do not allow it to set-up.

Raspberry Chambord Sauce
*12 oz. frozen raspberries
*1/2 cup water
*1/4 cup (or more if you like a sweeter sauce) sugar
*1/2 cup chambord

Combine raspberries, water, and sugar in saucepan, heat to a boil. Let boil for 3 minutes and remove from heat. Place in fine strainer over bowl and let drain for 30 minutes. You may need to push at pulp with the back of a spoon. When cool, add chambord.